In this article, We will explore the .NET 6 CRUD API example in detail along with the minimal API concept.
Let’s start with the SQL database connection basic example.

Create SQL Database Connection in .NET 6 Console Application
In this example, we will create a .NET 6 Console Application to create an SQL Database connection and will try to fetch sample records from a table.
Create a .NET 6 Console application in Visual Studio 2022.
Now write the below code snippet in the Program.cs file.
using Microsoft.Data.SqlClient;
using System.Data;

Console.WriteLine("SQL Connection Test");
try
{
    SqlConnectionStringBuilder builder = new SqlConnectionStringBuilder();
    builder.DataSource = "localhost";
    builder.UserID = "username";
    builder.Password = "password";
    builder.InitialCatalog = "PilotDB";


    var listUserModel = new List<UserModel>();
    Console.Write("Connecting to SQL Server. Please Wait ... ");
    using (SqlConnection con = new SqlConnection(builder.ConnectionString))
    {
        SqlCommand cmd = new SqlCommand("GetData", con);
        cmd.CommandType = CommandType.StoredProcedure;
        con.Open();
        SqlDataReader rdr = cmd.ExecuteReader();
        while (rdr.Read())
        {
            listUserModel.Add(new UserModel
            {
                Id = Convert.ToInt32(rdr[0]),
                Name = rdr[1].ToString()

            });
        }
        Console.WriteLine("Print Your Data Here");
        Console.ReadKey();
    }
}
catch (Exception ex)
{
    Console.WriteLine("\n");
	Console.WriteLine(ex.Message);
    Console.ReadKey();
}

public class   UserModel
{
    public int Id { get; set; }
    public string? Name { get; set; }
}
Add the below namespaces, if not added automatically.
using Microsoft.Data.SqlClient;
using System.Data;
In case you want to use Windows Authentication then use builder.IntegratedSecurity property.
 SqlConnectionStringBuilder builder = new SqlConnectionStringBuilder();
    builder.DataSource = "localhost";
    builder.InitialCatalog = "PilotDB";
    builder.IntegratedSecurity = true;
Run the application and you will see that the SQL Database is successfully connected.
Create .NET 6 CRUD API Example
Let’s move further and now we will create a .NET 6 Web API project where we will perform complete CRUD operation.
Create a .NET 6 Web API project in Visual Studio 2022.
Add a class for Database Context. Name this class MyDBContext. Inherit this class from DbContect class.
DbContext
DbContext class represents a session with the database and can be used to query and save instances of your entities.
Next, generate a constructor for the MyDBContext class. Either you can write it manually or click on the class name and press Alt + Enter and then select Generate constructor with options parameter.
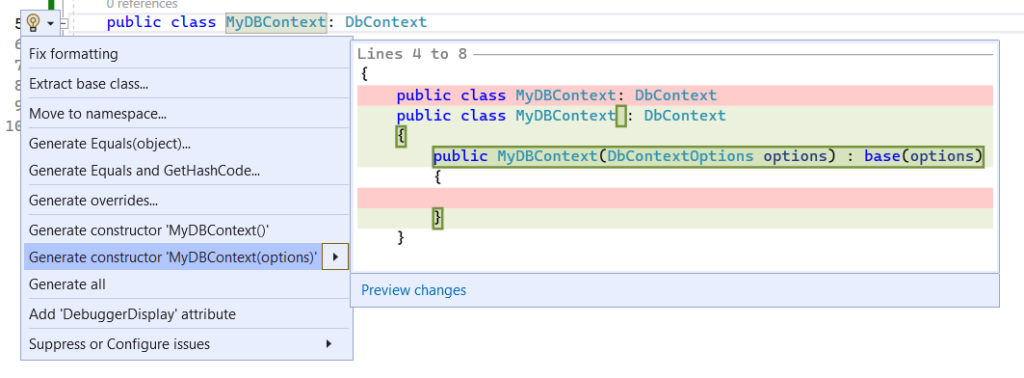
Your class will look like this.
public class MyDBContext : DbContext
    {
        public MyDBContext(DbContextOptions options) : base(options)
        {

        }
    }
Add the below line in MyDBContext.cs file
public DbSet<Product>? Products { get; set; }We need to add the below packages to the project.
        <PackageReference Include="AutoMapper" Version="12.0.1" />
       <PackageReference Include="AutoMapper.Extensions.Microsoft.DependencyInjection" Version="12.0.0" />
    <PackageReference Include="Microsoft.EntityFrameworkCore" Version="6.0.0" />
    <PackageReference Include="Microsoft.EntityFrameworkCore.SqlServer" Version="6.0.0" />
Next, We will add Model classes.
First, create a Product.cs class and add the below properties.
  public class Product
    {
        public int Id { get; set; }
        public string? Name { get; set; }
        public string? Description { get; set; }
        public string? Category { get; set; }


    }
Similarly, create another class RequestModel.cs
 public class RequestModel
    {
        [Required]
        public int Id { get; set; }
        [Required]
        public string? Name { get; set; }

        [Required]
        public string? Description { get; set; }

        [Required]
        public string? Category { get; set; }
    }
Create a model for Update and name it UpdateModel.cs
 public class UpdateModel
    {

        [Required]
        public string? Name { get; set; }

        [Required]
        public string? Description { get; set; }

        [Required]
        public string? Category { get; set; }
    }
We will use AutoMapper to map the properties of Model classes.
Create a class for AutoMapper. Name this class – AutoMapperProfile.cs
            CreateMap<RequestModel, Product>();
            CreateMap<Product, RequestModel>();

            CreateMap<UpdateModel, Product>();
            CreateMap<Product, UpdateModel>();
Or you can use Reverse Map also.
  CreateMap<RequestModel, Product>().ReverseMap();
  CreateMap<UpdateModel, Product>().ReverseMap();
In case you want to ignore or exclude a field in the Update request then you can map like this to ignore a field called Id.
CreateMap<UpdateModel, Product>().ForMember(dest => dest.Id, opt => opt.Ignore());Now add a controller class within the project. For this article, the controller class name is ReadWriteController.cs
Declare below 3 properties.
       private MyDBContext _context;
        private readonly MapperConfiguration _mapperConfiguration;
        private readonly IMapper _mapper;
Initialize the constructor
public ReadWriteController(MyDBContext context, IMapper mapper)
        {
            _context = context;
            _mapper = mapper;
        }
Action Method to get all Product data.
 [HttpGet]
        public IEnumerable<Product> Get()
        {
            var products = _context.Products;
            return products;
        }
Below Action Method to get a product by ID
[HttpGet("{id}")]
        public Product Get(int id)
        {
            var product = _context.Products.Find(id);
            if (product == null) throw new KeyNotFoundException("No Data Found");
            return product;
        }
Below is the Action method to create a new request
 [HttpPost]
        public void Post(RequestModel requestModel)
        {
            var prd = _mapper.Map<Product>(requestModel);
            _context.Products.Add(prd);
            _context.SaveChanges();
        }
Action Method to Update a Record.
 [HttpPut("{id}")]
        public void Put(int id, UpdateModel requestModel)
        {
            var product = GetProductById(id);

            _mapper.Map(requestModel, product);
            _context.Products.Update(product);
            _context.SaveChanges();
        }
The below Action method is to Delete a request
 [HttpDelete("{id}")]
        public void Delete(int id)
        {
            var product = GetProductById(id);
            _context.Products.Remove(product);
            _context.SaveChanges();
        }
I have created a method to get the details by ID which is used for Delete and Update operation.
 private Product GetProductById(int id)
        {
            var product = _context.Products.Find(id);
            if (product == null) throw new KeyNotFoundException("No Data found");
            return product;
        }
Add the code snippet below in the Program.cs file to register DBContext.
builder.Services.AddDbContext<MyDBContext>(options =>
{
    options.UseSqlServer(builder.Configuration.GetConnectionString("DefaultConnection"));
});

builder.Services.AddAutoMapper(typeof(AutoMapperProfile));
Below is the complete Controller class
namespace WebApplication1.Controllers
{
    [Route("api/[controller]")]
    [ApiController]
    public class ReadWriteController : ControllerBase
    {
        private MyDBContext _context;
        private readonly MapperConfiguration _mapperConfiguration;
        private readonly IMapper _mapper;
        public ReadWriteController(MyDBContext context, IMapper mapper)
        {
            _context = context;
            _mapper = mapper;
        }

        // GET: api/<ReadWriteController>
        [HttpGet]
        public IEnumerable<Product> Get()
        {
            var products = _context.Products;
            return products;
        }

        // GET api/<ReadWriteController>/5
        [HttpGet("{id}")]
        public Product Get(int id)
        {
            var product = _context.Products.Find(id);
            if (product == null) throw new KeyNotFoundException("No Data Found");
            return product;
        }

        // POST api/<ReadWriteController>
        [HttpPost]
        public void Post(RequestModel requestModel)
        {
            var prd = _mapper.Map<Product>(requestModel);
            _context.Products.Add(prd);
            _context.SaveChanges();
        }

        // PUT api/<ReadWriteController>/5
        [HttpPut("{id}")]
        public void Put(int id, UpdateModel requestModel)
        {
            var product = GetProductById(id);

            _mapper.Map(requestModel, product);
            _context.Products.Update(product);
            _context.SaveChanges();
        }

        // DELETE api/<ReadWriteController>/5
        [Route("DeleteProduct")]
        [HttpDelete("{id}")]
        public void Delete(int id)
        {
            var product = GetProductById(id);
            _context.Products.Remove(product);
            _context.SaveChanges();
        }

        private Product GetProductById(int id)
        {
            var product = _context.Products.Find(id);
            if (product == null) throw new KeyNotFoundException("No Data Found");
            return product;
        }
    }
}
Program.cs file
using AutoMapper;
using Microsoft.EntityFrameworkCore;
using WebApplication1;

var builder = WebApplication.CreateBuilder(args);

// Add services to the container.

builder.Services.AddControllers();

builder.Services.AddDbContext<MyDBContext>(options =>
{
    options.UseSqlServer(builder.Configuration.GetConnectionString("DefaultConnection"));
});

builder.Services.AddAutoMapper(typeof(AutoMapperProfile));


var app = builder.Build();

app.MapGet("/list", async (MyDBContext db) =>
{
    var products = await db.Products.ToListAsync();
    return Results.Ok(products);
});

app.MapPost("/save", async (Product requestModel, MyDBContext db) =>
{
    db.Products.Add(requestModel);
    await db.SaveChangesAsync();
    return Results.Ok();

});

// Configure the HTTP request pipeline.

app.UseHttpsRedirection();

app.UseAuthorization();

app.MapControllers();

app.Run();
Create a minimal API in .NET 6 to work with SQL Databases
Minimal API is one of the most interesting features of .NET 6. REST APIs can now be written with very few dependencies using .NET6.
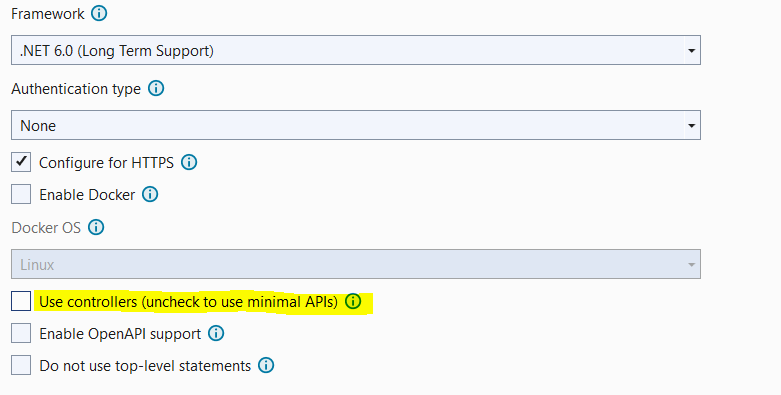
While creating a .NET 6 Web API project in Visual Studio 2022, you may notice that there is a checkbox – Use Controllers (uncheck to use minimal APIs) (As shown below screenshot)
If you uncheck this option, you may notice that there is no controller folder in your newly created project folder. Instead, you will find a default Get Action method in the Program.cs file itself.
In minimal API, app.MapGet is used for GET operations and app.MapPost is to create a new request, app.MapPut and app.MapDelete for Update and Delete respectively.
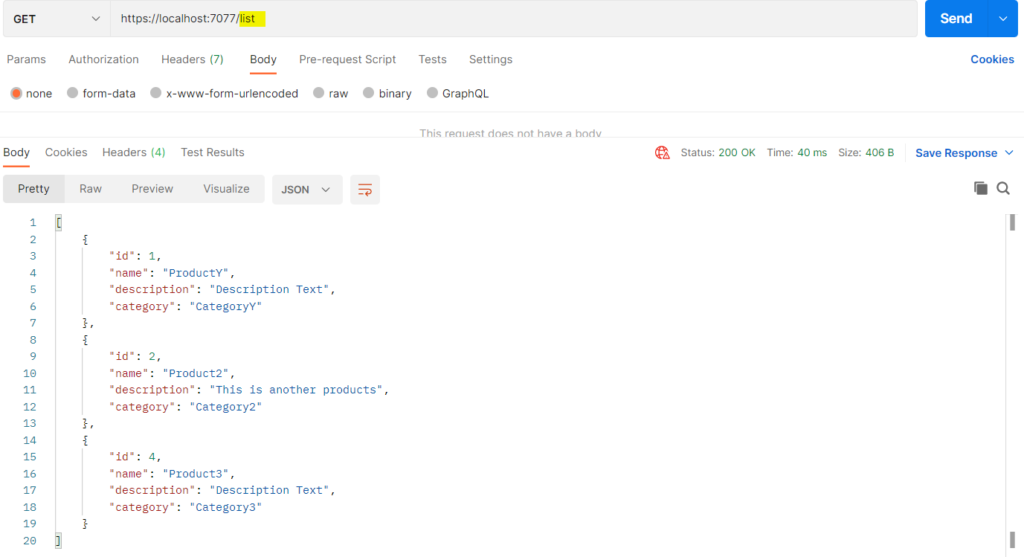
Below is the minimal API code to fetch all Product data.
app.MapGet("/list", async (MyDBContext db) =>
{
    var products = await db.Products.ToListAsync();
    return Results.Ok(products);
});
To Save data, we have used app.MapPost.
For POST operation, in lambda expression, we have to pass the model and then DBContext.
app.MapPost("/save", async (Product requestModel, MyDBContext db) =>
{
    db.Products.Add(requestModel);
    await db.SaveChangesAsync();
    return Results.Ok();

});
Takeaway
In this article, we demonstrated how to perform CRUD operations using the .NET 6.0 API. We also covered the basic concept of creating an HTTP API with minimal dependencies which were introduced in .NET 6.
Hope you like this article.


Leave a Reply