In this article, we will learn the concept of SignalR and also we will implement basic SignalR in .Net Core.
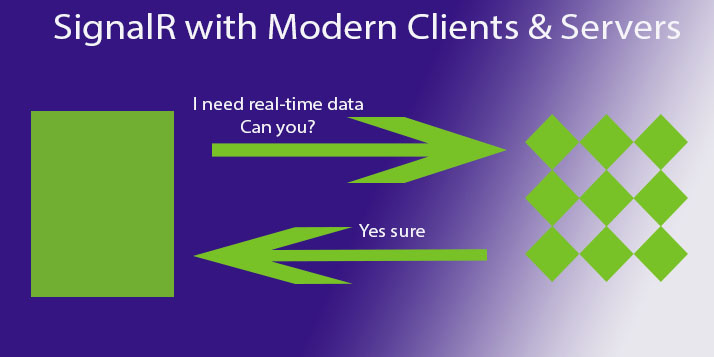
Real-time communication is one of the crucial features in the modern tech world, this means allowing users to exchange information without using any page refresh. That’s what the SignalR does.
What is SignalR?
SignalR refers to a real-time application communication channel. It is a process that allows the integration of real-time functionality into your web applications.
So, in a real-time process, the server sends data or content to the client instantly as it becomes available instead of waiting for the client to send a new request.
The best example of a real-time application is a chat application, where the server sends content to the client as soon as it becomes available.
We can use SignalR to push notifications within an application.
It uses encryption and a digital signature to make a secure communication channel.
Download the source code from our repository : SignalR V3SignalR Architecture
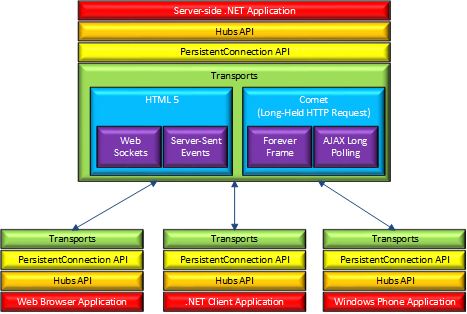
The below diagram depicts the architecture of SignalR in ASP.Net Core
Let’s create a client-server communication using SignalR in ASP.NET Core
We will now implement SignalR in .NET Core using Visual Studio 2022.
Pre-requisites
To demonstrate this article, we need the below IDE and Framework.
- Visual Studio 2019 or Visual Studio 2022 (To demonstrate SignalR we will use Visual Studio 2022.)
- .NET Core 3.1 or .NET 5 or Later versions
To understand the SignalR concept, first, we will create a basic C# application using .NET Core. In this application, we will send a chat message to the server and instantly it will throw this message to the client and the same will display in the client’s window.
SignalR Implementation in .NET Core
Let’s follow the steps below to create a small application that shows the uses of SignalR.
1 – Create an ASP.NET Core MVC application in Visual Studio and choose the target Framework
2 – Right-click on the project name in Solution Explorer. Select Add->Client-Side Library…
3 – Select unpkg from Provider and type Microsoft/signalr in Library to search.
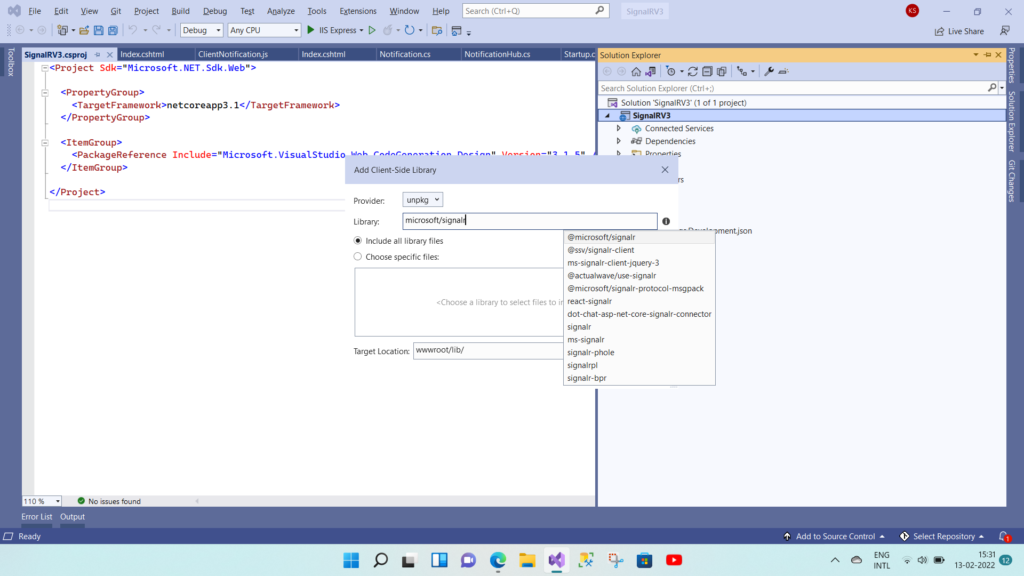
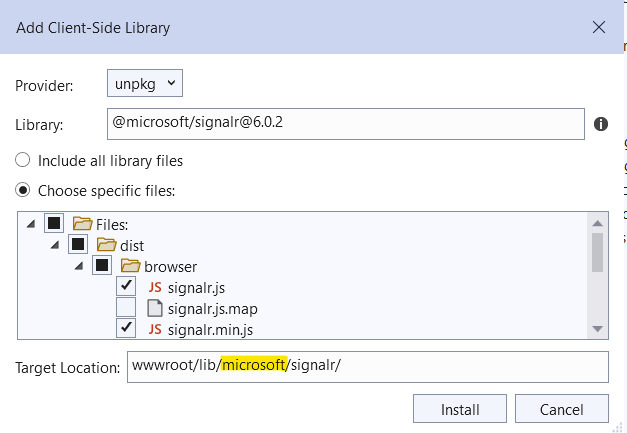
4 – Select @microsoft/signalr from the search results. And click “Choose specific files”. Select signalr.js and signalr.min.js from the list as shown below. Next, remove “microsoft” from the Target location.
5 – We will now add a model ChatMessage.cs
namespace SignalRV3.Models
{
    public class ChatMessage
    {
        public string Message { get; set; }
    }
}
6 – Add a class file and name it ChatHub.cs
using Microsoft.AspNetCore.SignalR;
using System.Threading.Tasks;
namespace SignalRV3.Hubs
{
    public class ChatHub: Hub
    {
    }
}
7 – Add 2 controllers. ClientController.cs and ServerController.cs
Below is the code snippet of ClientController class
using Microsoft.AspNetCore.Mvc;
namespace SignalRV3.Controllers
{
    public class ClientController : Controller
    {
        public IActionResult Index()
        {
            return View();
        }
    }
}
8 – Add a View for Index action in ClientController class.
Add a reference of signalr.js file in Views/Client/Index.cshtml file
<script src="/lib/signalr/dist/browser/signalr.js"></script>Below is the complete code snippet of the View page of Index() method of ClientController.cs file
Note that in the Connection variable, you may notice the URL “/chatHub”, the same URL needs to map in the startup.cs file. That we will see later in this article.
@*
For more information on enabling MVC for empty projects, visit https://go.microsoft.com/fwlink/?LinkID=397860
*@
@{
}
@{
ViewData["Title"] = "Client View";
}
<h1>Client View</h1>
<div id="chats">
</div>
<script src="/lib/signalr/dist/browser/signalr.js"></script>
<script>
var connection = new signalR.HubConnectionBuilder().withUrl("/chatHub").build();
connection.start();
connection.on("Message", function (msg) {
var chatmessage = document.createElement("p");
chatmessage.textContent = msg;
document.getElementById("chats").appendChild(chatmessage);
});
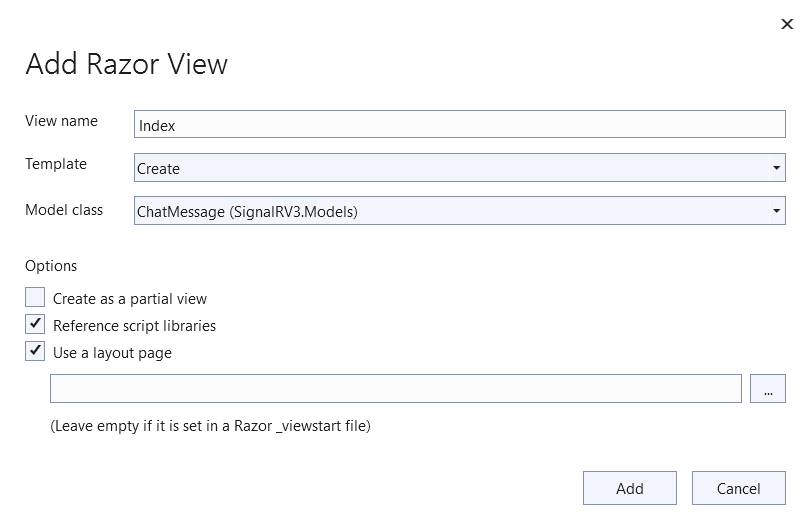
</script>9 – Add a view for Index action in ServerController class. Select “Create” from the Template and Model class to create View.
[HttpGet]
public IActionResult Index()
{
   return View();
}
Add a HttpPost method in ServerController class.
[HttpPost]
public async Task<IActionResult> Index(ChatMessage model)
{
   await _notificationHub.Clients.All.SendAsync("Message", model.Message);
   return View();
}
Below is the complete code snippet of the ServerController.cs file. We need one HttpGet and one HttpPost operation in this controller.
using Microsoft.AspNetCore.Mvc;
using Microsoft.AspNetCore.SignalR;
using SignalRV3.Hubs;
using SignalRV3.Models;
using System.Threading.Tasks;
namespace SignalRV3.Controllers
{
    public class ServerController : Controller
    {
        private readonly IHubContext<ChatHub> _chatHub;
        public ServerController(IHubContext<ChatHub> chatHub)
        {
            _chatHub = chatHub;
        }
        [HttpGet]
        public IActionResult Index()
        {
            return View();
        }
        [HttpPost]
        public async Task<IActionResult> Index(ChatMessage model)
        {
            await _chatHub.Clients.All.SendAsync("Message", model.Message);
            return View();
        }
    }
}
10 – Add services.AddSignalR(); in the ConfigureServices() method in the startup.cs file:
public void ConfigureServices(IServiceCollection services)
{
  services.AddControllersWithViews();
  services.AddSignalR();
}
Add endpoints.MapHub("/chatHub") in Configure() method:
app.UseEndpoints(endpoints =>
{
  endpoints.MapControllerRoute(
            name: "default",
            pattern: "{controller=Home}/{action=Index}/{id?}");
            endpoints.MapHub<ChatHub>("/chatHub");
});
Press F5 and let’s run the application. Open 2 browser windows. One is in incognito mode.
In the first window hit /Server/Index and in incognito hit /Client/Index URL.
Type messages in Server/Index pages and click on the Send button and the client window will receive the same message.
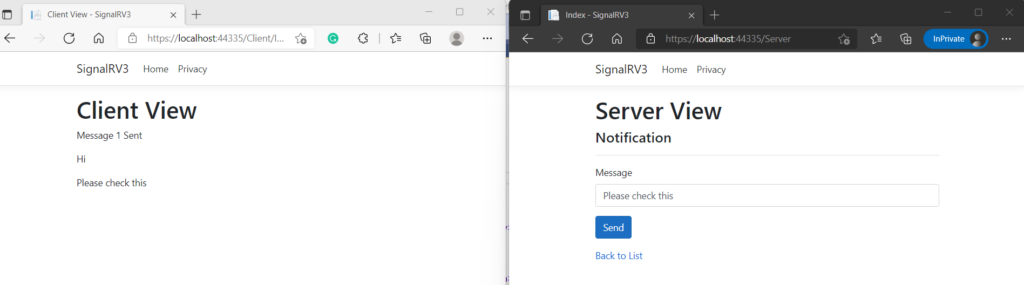
If you will open developer tools for the Client View page and go to the Console tab. You may notice Websocket connected.

What is Hub class in SignalR?
It is a high-level pipeline between client and server for real-time communication. It makes it easy to manage and invoke the methods of connected clients.
Hubs automatically manage the connection tasks. Hub manages the incoming and outgoing messages.
Summary
SignalR is a new library given by Microsoft to add real-time functionality to the application. To use SignalR in the .NET Core web application, we need to add microsoft/signalr client library to our application.
So, we can use SignalR in .NET Core to create a chat application or a notification centre. SignalR sends data over an encryption channel to create a secure communication channel.


Leave a Reply