Hello everyone, in my earlier blog I have already explained about “Create and Deploy WebApp in Azure App service“. That deployment was done using Visual Studio 2015. Now as you all know that Microsoft has released .Net Core 2.0 and Visual Studio 2017.
So, I downloaded Visual Studio 2017 Community Edition to deploy my ASP.Net web application to Microsoft Azure. Here deployment steps are slightly different than what we have in Visual Studio 2015.
Get Started with Azure Development
“Developing applications for Azure is a seamless integrated experience in the IDE you know and love.
Visual Studio 2017 includes all you need to get started developing for Azure. Enable the Azure workload in Visual Studio 2017, and you are good to go.”
For Microsoft Azure Certification list visit this link

Microsoft Azure Certification List
https://www.visualstudio.com/downloads/
If you are an individual developer then you should download Community Edition only, it supports all IDE features which require for an Individual.
I have already downloaded and installed Visual Studio 2017.
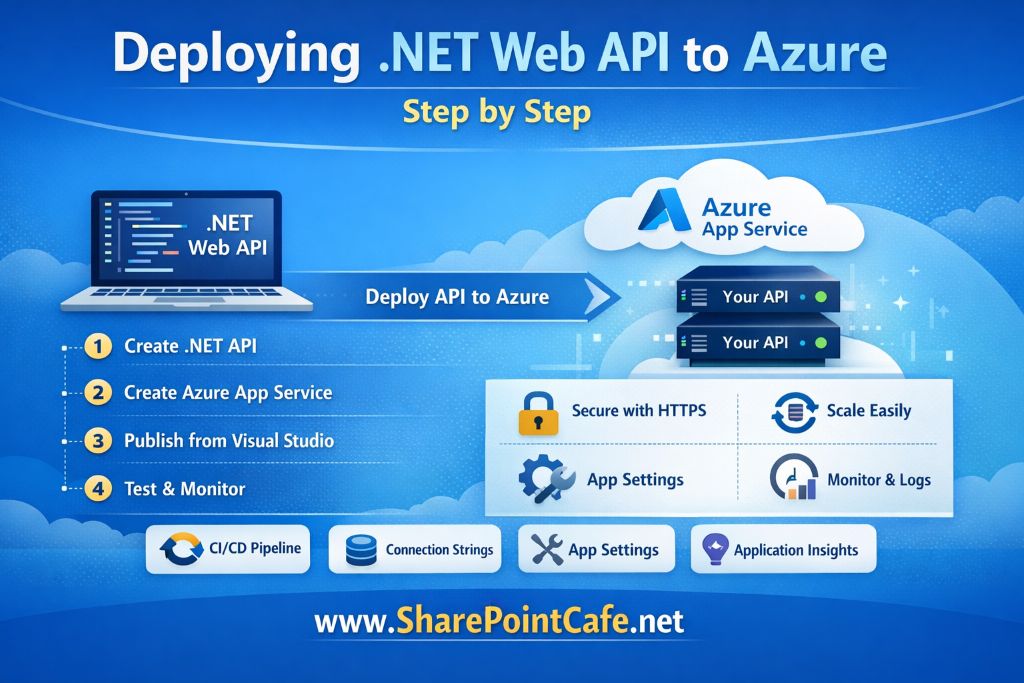
How to deploy Web Application to Microsoft Azure using Visual Studio 2017 ?
Here is the welcome screen of Visual Studio 2017.

Follow below steps to deploy your Web Application to Microsoft Azure using Visual Studio 2017.
Create a new Web Application. Select Cloud from Installed Template and Select ASP.Net Web Application.

Here I am creating an Empty web application and will add on aspx page to test.
You may select as per your requirement.

Add an aspx page to your Project.
Write your code.
Right click on Project name in solution explorer and select Publish to Microsoft Azure

Visual Studio 2017 will open Publishing screen for you.
If this is the first time you are deploying to Microsoft Azure then select Create New, else “Select Existing”

Once logged in successfully, your subscription and other details will load if you have already done a deployment. Else you have to create new

Click on OK and Publishing will start.

Once publishing action is completed successfully you may browse URL. You may see URL in Publishing wizard. Refer earlier screen shot.
You may notice URL has 4 parts below.
AzureSharePointCafe – This is the name I gave while deploying my first Web Application to Azure service. Please refer earlier screen shot.
AzureWebsites – Added by Microsoft Azure
.net – This is the top level domain or TLD

Now there is one another deployment way in Visual Studio 2017.
Microsoft Azure Project in Visual Studio 2017.
You may convert your project into Cloud Azure Project. To do this right click on your project Convert → Convert to Azure.
Now Right click on Azure Project and select Publish. See highlighted area.

It will prompt for your account details. Login to account if an account is not showing. Click Next.

Now give a name and select a region. Click Next.

You can see your setting in below screen. Click Publish.

Once publishing Done.
Click on Deployment in the bottom area of Visual Studio 2017.

Once Deployment is done successfully, It will show the URL and other details. Just browse the URL and you will start smiling after looking at your browser as your page is running on Microsoft Azure.

If this blog is helpful to you, please write your comment below and subscribe to this blog.
You may read some popular blogs on SharePointCafe.Net |
Keep following SharePointCafe.Net for upcoming blogs.


Leave a Reply