One of the most important elements of Angular is Directive. In this article, we will learn What are Angular Directives and its type and how to create custom directives.
What are Directives in Angular?
Directives in Angular extend the use of HTML by adding custom behavior. Angular Directives add or modify the existing behavior to an element in the HTML template.
So, we can say that, Angular Directives are used to manipulate the DOM in HTML. The manipulation of DOM may change the behavior as well as the appearance.
Types of Directives
There are 3 types of directives in Angular –
- Component Directives
- Structural Directives
- Attribute Directives
Component Directives
It is a directives with a template. Components are the most common directives among all. We can not create an Angular app without component directives. Naming conventions of a component in Angular app is <name>.component.ts
For eg Name of a Component for product in an Angular app product.component.ts
Sample code for Component is shown below:
@Component({
selector: ‘app-product’,
template: ‘<h1>Product Details</h1>’,
styles: [‘h1{color:blue}’]
})
Structural Directives
Structural Directives make changes in DOM by altering DOM elements. These directives in Angular starts with *
For example – *ngIf , *ngFor , *ngSwitch
Let’s see structural directives one by one.
NgIF Directive
Created a new component MyNew
Declared a field val and assign true as value.
Now in template, I applied *ngIf directive to display content based on value of val declared in MyNew class.
Try below component code:
@Component({
  selector: ‘app-my-new’,
  template: `<h1 *ngIf=”val”>
    This is ngif Test
    </h1>`,
  styleUrls: [‘./my-new.component.css’]
})
export class MyNewComponent implements OnInit {
  constructor() { }
  ngOnInit() {
  }
  val = true;
}
NgIf with Else
Angular 4 introduces *ngIf with else condition:
@Component({
  selector: ‘app-my-new’,
  template: `<div *ngIf=”num==10; else mismatch”><h2>Number Matched</h2></div><ng-template #mismatch><h2>Number Mismatched</h2></ng-template>`,
  styleUrls: [‘./my-new.component.css’]
})
export class MyNewComponent implements OnInit {
  constructor() { }
  ngOnInit() {
  }
  num = 20;
}
NgSwitch Directive
Use of NgSwitch in Angular application is similar to switch statement in C# or other programming languages.
In below code, declared a variable with name products and in template I have used ngSwitch directives.
Based on value passed in products, switch case will execute and will show the output:
@Component({
  selector: ‘app-my-new’,
  template: `<div [ngSwitch]= “products”>
<p *ngSwitchCase=”‘Laptop'”>You need to buy a Laptop</p>
<p *ngSwitchCase=”‘Mobile'”>You need to buy a Mobile</p>
<p *ngSwitchCase=”‘Tablet'”>You need to buy a Tablet</p>
<p *ngSwitchCase=”‘TV'”>You need to buy a TV</p>
<p *ngSwitchCase=”‘Washing Machine'”>You need to buy a Washing Machine</p>
</div>`,
  styleUrls: [‘./my-new.component.css’]
})
export class MyNewComponent implements OnInit {
  constructor() { }
  ngOnInit() {
  }
  public products = “Mobile”;
}
NgFor Directive
@Component({
selector: ‘app-my-new’,
template: `<ul *ngFor=”let prd of products”>
<li>{{prd}}</li>
</ul>`,
styleUrls: [‘./my-new.component.css’]
})
export class MyNewComponent implements OnInit {
constructor() { }
ngOnInit() {
}
public products = [“Laptop”,“TV”,“Washing Machine”,“Tablet”,“Mobile”];
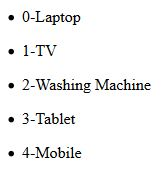
}NgFor directive with index numbers
@Component({
  selector: ‘app-my-new’,
  template: `<ul *ngFor=”let prd of products; index as i”>
<li>{{i}}-{{prd}}</li>
</ul>`,
  styleUrls: [‘./my-new.component.css’]
})
Note: Index starts with 0.
Output –
Attribute Directives
Attribute directives make changes in appearance and behavior of an element or component.
Let’s declare two variables in your component class.
public bgColor = false;public fontColor = true;
Add below classes to style files:
.bgClass {
background-color: blue;
}
.fontColor {
color: red;
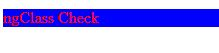
}In HTML file write below code:
<p [ngClass]=”{bgClass:bgColor,fontColor:fontColor}”>
  ngClass Check
</p>
You will see below output –
Let’s play with ngClass by adding a button in HTML.
Add a method called ToggleStyle() in component class:
public bgColor = true;
  public fontColor = true;
  ToggleStyle() {
    this.bgColor = !this.bgColor;
    this.fontColor = !this.fontColor;
  }
In HTML, call this function:
<button (click)=”ToggleStyle()”>Change Style</button>
By clicking on this button, you may apply or remove style written in style file.
Hope you like this blog. Please share this blog on social media and subscribe to this blog.
You may like other blogs –
MVC Tutorial
Web API Tutorial
Angular Tutorial
Learn TypeScript
Interview Questions and Answers Series –
MVC Interview Questions and Answers
Web API interview questions and answers
Keep following – SharePointCafe.Net


Leave a Reply