A reusable component is a pillar of web development that makes your development fast, reliable, and scalable.
In this article, we will create custom and reusable HTML components. We will learn how we can implement reusable components in HTML with the help of JavaScript only. We will not use React or Angular to demonstrate reusable components in HTML.

What are reusable components?
When a component is used more than once, it is referred to as reusable. For example, the header and footer part of a web page are used on all the pages.
So we have to make that component reusable.
Why we should choose reusable components?
The 4 main reasons to go for reusable components.
- Efficient
- Consistent
- Maintainable
- Scalable
Reusable component in HTML
The header and footer are the most suitable examples to understand the reusability in HTML. Suppose, you have 20 or 30 HTML pages on your website. The client requested minor changes to the header and footer throughout the website.
No matter how small, but has to be repeated across all those files. This is a frustrating task in web development.
Earlier, it was not possible in HTML. But with the introduction of Web Components, it’s possible to create reusable components using JavaScript.
What Are Web Components?
Web Components are a collection of technologies that allow you to create reusable custom HTML elements. These are –
- HTML Templates – A piece of HTML code that will be rendered using a template element with the help of JavaScript.
- Custom Elements – Create a new DOM element using JavaScript
- Shadow DOM – It creates a new DOM isolated from the main DOM.
Reusable component with HTML Templates
Create an HTML page and add an HTML template tag as shown in below code snippet below. To render the content on the browser, you’ll have to use a few lines of JavaScript.
index.html
<!DOCTYPE html>
<html>
<head>
    <meta charset="UTF-8">
    <meta name="viewport" content="width=device-width, initial-scale=1.0">
    <meta http-equiv="X-UA-Compatible" content="ie=edge">
    <link href="style.css" rel="stylesheet" type="text/css" />
    <script src="file.js" type="text/javascript" defer></script>
</head>
<body>
    <template id="content">
        <h1>Hello, World! </h1>

    </template>
</body>
<html>
Write below 2 lines of JavaScript and save it in a file called file.js. Link this file to your HTML and then run the page on the browser, you will see the output.
file.js
const template = document.getElementById('content');
document.body.appendChild(template.content);
Reusable component with HTML Custom Elements
This is another technique to implement reusable components in HTML.
This is the way to define your own HTML tag to place your HTML code. You can use <menu-component> for menu items or <footer-component> for the bottom area of the page.
So let’s start the implementation without further delay.
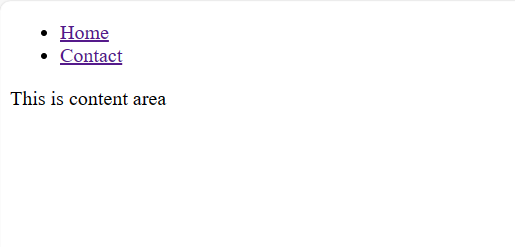
Look carefully at the HTML page given below and assume that your website has 10, 20, or more similar pages.
Now suppose you have to add something new to the menu or make some changes to the given menu items. If you have to do this, you will get upset and at the same time, you will not want to do this repetitive work. No worries, now you will be able to do it very easily. Let’s begin.
<!DOCTYPE html>
<html>
<head>
    <meta charset="UTF-8">
    <meta name="viewport" content="width=device-width, initial-scale=1.0">
    <meta http-equiv="X-UA-Compatible" content="ie=edge">
    <link href="style.css" rel="stylesheet" type="text/css" />
</head>
<body>

    <ul>
        <li><a href="">Home</a></li>
        <li><a href="">Contact</a></li>
    </ul>
    <div>
        <p>This is content area</p>
    </div>
</body>
<html>
The first thing you have to do is to create a JavaScript file and add your HTML code as innerHTML as shown in the below code snippet.
class Menu extends HTMLElement {
    constructor() {
        super();
    }
    connectedCallback() {
        this.innerHTML = `
    <ul>
        <li><a href="">Home</a></li>
        <li><a href="">Contact</a></li>
    </ul>
`
    }
};
customElements.define('menu-component', Menu);
Link this JavaScript file to your HTML pages. Make a note that we have defined a custom element named <menu-component> in the JavaScript file, we will add it to the HTML page as shown in the code snippet below.
Congrats!! you have successfully created your first custom HTML component.
<!DOCTYPE html>
<html>
<head>
    <meta charset="UTF-8">
    <meta name="viewport" content="width=device-width, initial-scale=1.0">
    <meta http-equiv="X-UA-Compatible" content="ie=edge">
    <link href="style.css" rel="stylesheet" type="text/css" />
    <script src="menu.js" type="text/javascript" defer></script>
</head>
<body>
   <menu-component></menu-component>
    <div>
        <p>This is content area</p>
    </div>
</body>
<html>
When you link the JavaScript file to all your site pages, from now onwards changes in the JavaScript document will resonate all HTML pages.
This way we can achieve the reusability feature in HTML which makes our website development easy and much faster.
Summary
We’ve covered a great deal here about custom and reusable parts in HTML.
Web Components are an integral asset for making reusable, and customized parts. They are supported by all modern web browsers.
Ideally, now you have the confidence to make your own reusable HTML parts. Isn’t it? Hope the answer is yes 🙂
Happy Learning !! Follow SharePointCafe.Net


Leave a Reply